Getting into an accident is stressful enough; navigating the aftermath shouldn’t be. That’s where understanding the collision repair process comes in. Whether you’re dealing with minor dents or major structural damage, knowing what to expect can make the journey back to a safe, road-ready vehicle far less overwhelming.
In this guide, we’ll walk you through each step of the collision repair process, so you can approach it with confidence and clarity.
What Is the Collision Repair Process?
The collision repair process refers to the structured steps that auto body professionals follow to restore a damaged vehicle to its pre-accident condition. It’s not just about fixing what’s visible. It’s about ensuring the car’s safety systems, structure, and appearance all meet the standards required for safe driving.
Modern repairs rely heavily on technology, from computerized diagnostics to advanced paint-matching systems. That’s why choosing a certified repair center with trained technicians is essential.
Step 1: Initial Damage Assessment
The process always begins with a detailed inspection. Technicians evaluate both visible and hidden damage—what you see on the surface is often just the tip of the iceberg. Behind a crumpled fender, there could be issues with sensors, the frame, or the suspension system.
A high-quality shop will document every issue and use this assessment to build a repair estimate. Most facilities now use digital tools to scan the car and identify internal damage that can’t be seen with the naked eye.
Pro Tip: Always ask for a written estimate that outlines labor, parts, and timeframes. This helps avoid surprises later in the process.
Step 2: Coordinating with Your Insurance Company
Next comes the back-and-forth with your insurance provider. Your repair shop may work directly with adjusters to streamline approvals, but it’s important that you understand your own policy—especially what’s covered and what isn’t.
During this step:
- A claim is filed (if you haven’t already done so).
- An adjuster may inspect the car in person or review the shop’s assessment.
- Approval is granted for the repair scope and costs.
A good body shop will act as your advocate, ensuring the insurance company authorizes all necessary repairs—not just the bare minimum.
At AutoLux Collision we handle all the insurance work to provide our clients with a hassle-free experience.
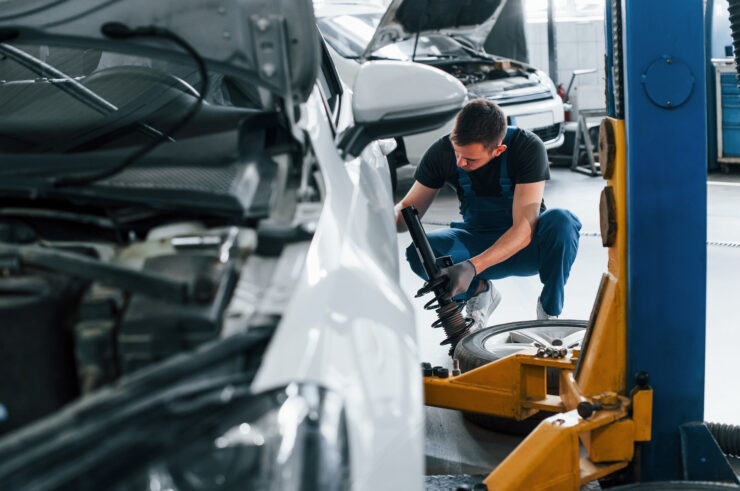
Step 3: Disassembly and Structural Inspection
Once approvals are in place, the real hands-on work begins. Your vehicle is carefully dismantled so technicians can get a full view of all affected areas. This phase is crucial—any structural damage must be addressed before cosmetic work begins.
For example, if the frame is bent, it must be measured and straightened with precision equipment to manufacturer specifications. Skipping or rushing this step compromises the integrity of your vehicle.
Step 4: Repair and Replacement
Depending on the damage, technicians will either repair or replace specific parts. Skilled bodyworkers can reshape panels and remove dents, but in some cases, it’s safer or more cost-effective to install new OEM or certified aftermarket parts.
If your car has advanced driver-assistance systems (ADAS), special attention is paid to recalibrate cameras, sensors, and electronics during this stage.
This is where true craftsmanship matters—down to how the seams align and how panels fit together.
Step 5: Painting and Refinishing
Once repairs are complete, your vehicle moves to the paint booth. High-end shops use dust-free, climate-controlled environments for a flawless finish.
Color-matching is a blend of art and science. Using digital spectrophotometers, technicians can match your car’s exact shade—even accounting for sun fading over time. After the paint is applied, layers of clear coat are added to protect the surface and create a seamless finish.
Step 6: Reassembly and Quality Control
After painting, the vehicle is reassembled with precision. Lights, bumpers, interior panels, and other components are carefully put back in place.
Before delivery, your car undergoes a series of quality control checks. This includes:
- Testing safety systems like airbags and collision sensors
- Verifying all mechanical systems function properly
- Inspecting paint and bodywork for consistency and finish
Some shops even offer road tests to ensure drivability and performance are on point.
Step 7: Final Customer Review and Delivery
You’ll be invited to inspect your vehicle before signing off on the repairs. This is your chance to ask questions, request clarification, and ensure everything meets your expectations.
Reputable repair shops take this moment seriously. At AutoLux Collision center we want you to feel confident in our work.
You’ll also handle final paperwork, which may include out-of-pocket costs not covered by insurance, depending on your policy.
Bonus: Post-Repair Care and Safety Tips
After picking up your car, there are a few things you should do:
- Review the warranty on both parts and labor—most shops offer limited or lifetime guarantees.
- Avoid automatic car washes for a few weeks to allow new paint to fully cure.
- Watch for any warning lights or irregularities, and don’t hesitate to bring the car back if something feels off.
Preventing future accidents starts with safe driving habits and routine vehicle maintenance. But should you need repairs again, understanding the collision repair process ensures you’re always one step ahead.
Why the Collision Repair Process Matters
A proper collision repair process doesn’t just restore your car—it restores your safety, peace of mind, and trust in your vehicle. Choosing a shop that prioritizes quality, transparency, and safety makes all the difference.
Whether you’re dealing with a fender bender or a major collision, take the time to choose certified technicians who will follow every step with precision and care.